.gif)
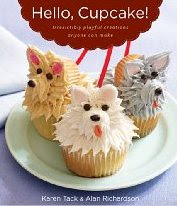
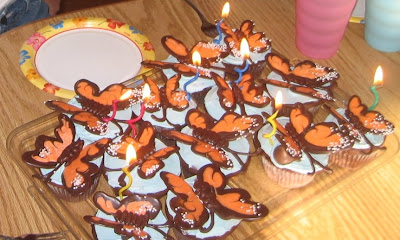
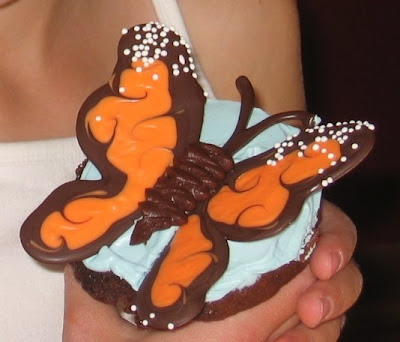
Unfortunately I can't claim this particular idea as my own. I followed the instructions for Monarch wings as detailed in the book Hello, Cupcake! by Alan Richardson and Karen Tack.
 I made a few changes to accommodate the requests of my customer; she asked for more "girly" colors. So instead of using dark melting chocolate and orange melting candy, I used almond bark and food coloring. The problem I discovered with the almond bark was that it dried really fast, and made it difficult to work with.
The basic process includes printing off a wing template and placing it underneath waxed paper, then outlining the template with one color of melted candy. Next you fill in the outline with another color candy, and then (quickly! before they dry!) use a toothpick to drag the outer color into the inner color. While the candy is still wet you can sprinkle non-pareils onto the wings, if you so desire. My initial mistake was to outline 3 sets of wings, then fill in 3 sets of wings, then try to drag in the colors. By the time I got back to the first set of wings, the candy was completely dry. I had to stick the butterflies in the oven to try and re-melt them, and it just wasn't a very smooth process. The second try went much better, working butterfly by butterfly. Eventually I ran out of almond bark and used some Baker's dark chocolate melting wafers, and they worked SO MUCH BETTER than the almond bark! The chocolate didn't harden nearly as fast. (I also made the antenna by simply tracing a template onto waxed paper and letting them harden.)
After the wings are made, and hardened, place them on the cupcake, propped up with a piece of candy such as an M&M, (I just piped some frosting and that did the same trick,) place the antennae, then pipe a frosting body down the middle.
That's it! It really wasn't too complicated, once I figured out how to do it right. And the best part was, the wings could be made ahead of time, so I didn't have to do the entire project in one day. ESSENTIAL when you have an 18-month-old in the house! :)
My sister-in-law inspired me to buy this book, and eventually try these cupcakes, after making them a last year for my niece's birthday. Don't they look great!?!? Thanks, Laura!

No comments:
Post a Comment